Convert Tib To Iso -
Instead of plugging in a USB flash drive, look at the media destination options: Select from the list of available media targets.
No, not with a one-click tool.
Open the software and go to or simply drag your files into the interface. Ensure the output format is set to Standard ISO . Click Convert .
The most reliable way to convert TIB data into an ISO is to use the native Acronis interface to expose the backup files, copy them, and compile them into an ISO using free software. Step 1: Mount the TIB File Open Windows File Explorer and locate your file.
Method 1: The Official Way – Using Acronis Rescue Media Builder
If you need the actual data within the TIB to be the contents of an ISO, there isn't a direct one-click converter. You have to use a workaround:
Converting a TIB file to an ISO is a crucial skill for anyone who values data portability and system flexibility. While a direct, one-click conversion tool is elusive, the reliable methods outlined in this guide provide a clear path forward. The is the most straightforward, while the two-step 'Restore and Capture' method serves as a powerful and reliable workaround.
Method 3: Using Third-Party Extraction Tools (Without Acronis Installed)
Launch (or Acronis True Image). Navigate to the Tools tab on the left sidebar. Select Rescue Media Builder .
Select your TIB file and choose the destination as . Convert VHD to ISO:
If you still require an ISO, use (restore to virtual disk, then create ISO from files) and accept that the result will not be bootable for OS environments.
This method involves restoring the backup into a virtual environment and then capturing that environment as an ISO.
In most cases, . You should not convert TIB to ISO because you will lose the backup's core advantages (incremental history, compression, encryption) and gain little, given that ISOs are optically limited.
: In Windows Explorer, right-click the .tib file and choose Acronis True Image > Mount to assign it a drive letter (e.g., E: ).
Convert Tib To Iso -
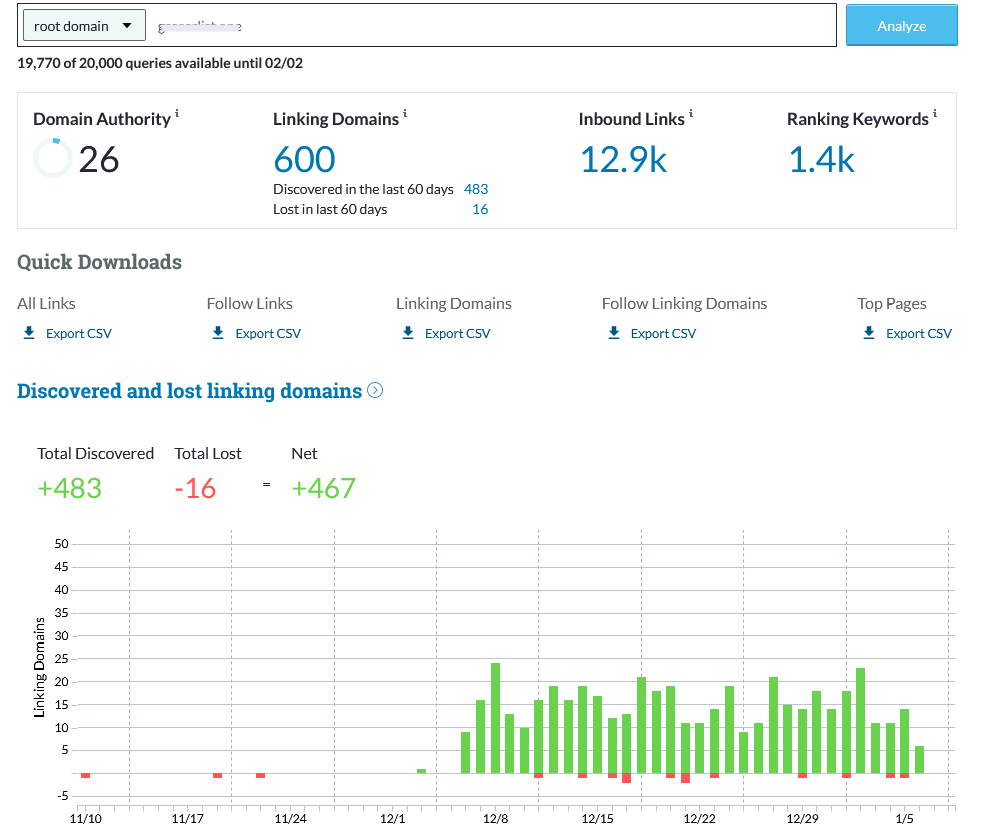
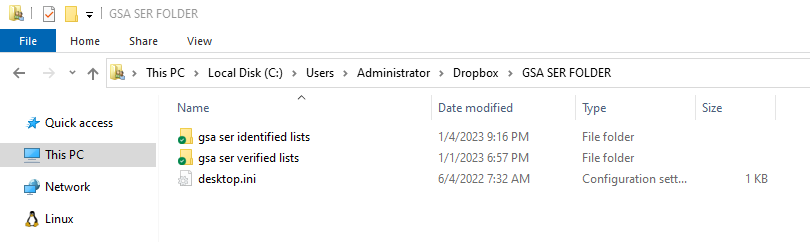
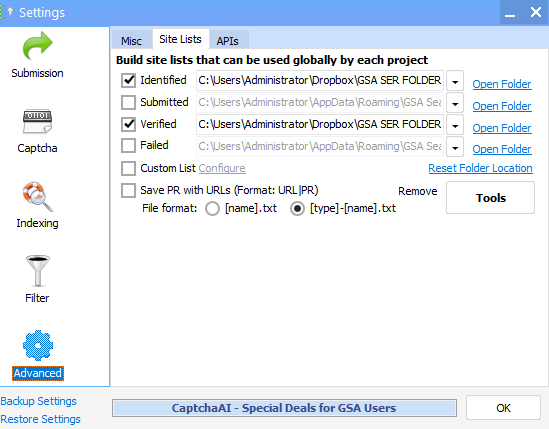
What exactly is GSA SER Verified List? And What is the best way to rank on It?
GSA Search Engine Ranker (SER) is an effective tool utilized by SEO professionals to create high-quality
link opportunity for their websites.
With GSA SER, marketers are able to quickly develop an inventory of verified hyperlinks that are
specifically tailored to the specific requirements of their clients. This allows them to concentrate on
those that are relevant and achieve the most effective outcomes.
Benefits of Using a GSA SER Verified List
The use of the GSA verified list for SER enables marketers to quickly and effortlessly identify top-quality
link building opportunities that can improve their rankings on search engine result page (SERPs).
convert tib to iso
It is constantly updated continuously to ensure that marketers can be assured that they are receiving the
most recent information available. Furthermore, many of the websites listed on the list are from sites that
are low-OBL Tier 1 This means they are more likely to attract high traffic and aid your blog or website to
climb up the ranks.
How Do You Improve Your Ranking by using the help of a GSA Verified Lists of SERs?
Once you've found opportunities to build links from the GSA SER verified list, it's crucial to concentrate
on creating content of high quality that is engaging for users and ultimately get them clicking on your site
or blog.
Instead of plugging in a USB flash drive,
Making informative, useful and relevant content can help you get higher rankings on the results pages of
search engines by demonstrating to Google that your website is an authority in the topic. It is also
important to ensure that all links link back to your site or blog, since this will provide Google the
impression of trustworthiness and relevancy when it comes to ranking.
What Are Some Best Practices When Using a GSA SER Verified List?
If you are using a GSA SER verified list, bear in your mind that when you are looking at link opportunities
for building quality must always take priority over the quantity. In addition, focusing on generating
articles that are valuable to users rather than trying to build the most links possible will ensure higher
rankings in the long run.
Ensure the output format is set to Standard ISO
Not last, you should be careful not to overuse keywords overly often to prevent your website from being
considered low-quality or spam and causing your rankings to drop instead of increasing.
Conclusion: SER Verified List
Utilizing the GSA SER list will offer SEO professionals with top-quality link
building options specifically to their requirements that can result in better rankings for their site or
blog over time, if followed correctly, following best practices, such by focusing on the creation of
high-quality content, not quantity, as well as avoiding keyword stuffing and so on.
In the end making use of this tool in the right way will allow you to achieve higher results in search
engine optimization more quickly than ever before!
Order Now
Instead of plugging in a USB flash drive, look at the media destination options: Select from the list of available media targets.
No, not with a one-click tool.
Open the software and go to or simply drag your files into the interface. Ensure the output format is set to Standard ISO . Click Convert .
The most reliable way to convert TIB data into an ISO is to use the native Acronis interface to expose the backup files, copy them, and compile them into an ISO using free software. Step 1: Mount the TIB File Open Windows File Explorer and locate your file.
Method 1: The Official Way – Using Acronis Rescue Media Builder
If you need the actual data within the TIB to be the contents of an ISO, there isn't a direct one-click converter. You have to use a workaround:
Converting a TIB file to an ISO is a crucial skill for anyone who values data portability and system flexibility. While a direct, one-click conversion tool is elusive, the reliable methods outlined in this guide provide a clear path forward. The is the most straightforward, while the two-step 'Restore and Capture' method serves as a powerful and reliable workaround.
Method 3: Using Third-Party Extraction Tools (Without Acronis Installed)
Launch (or Acronis True Image). Navigate to the Tools tab on the left sidebar. Select Rescue Media Builder .
Select your TIB file and choose the destination as . Convert VHD to ISO:
If you still require an ISO, use (restore to virtual disk, then create ISO from files) and accept that the result will not be bootable for OS environments.
This method involves restoring the backup into a virtual environment and then capturing that environment as an ISO.
In most cases, . You should not convert TIB to ISO because you will lose the backup's core advantages (incremental history, compression, encryption) and gain little, given that ISOs are optically limited.
: In Windows Explorer, right-click the .tib file and choose Acronis True Image > Mount to assign it a drive letter (e.g., E: ).